Home

|
|||
Pattern Digitizing 101In this article we discuss various ways of digitizing patterns and the advantages and disadvantages of each one over the other. Pattern digitizing is a crucial step of production in various industries such as apparel, upholstery, automotive, marine, aviation, metal sheets and similar industries where sewn products and metal sheets are manufactured. Particularly in textile industry digitizing is followed by grading, model design and marker making phases before the marker is sent to the cutting room. Considering this chain of production pattern digitizing adds to the overall process time. Therefore reducing time spent with digitizing is crucial since it directly translates to improved productivity. There are several ways to digitize patterns including digitizer tables, roll up digitizers, digitizing scanners and pattern digitizing software a.k.a photo digitizers. Considering each user and design studio should be seen as a different case as they have different requirements and priorities, their digitizing needs may be better met with a particular digitizing method mentioned above. However the majority of users will have similar pros and cons while digitizing by each of the methods below: |
|||
|
1- Digitizing Table
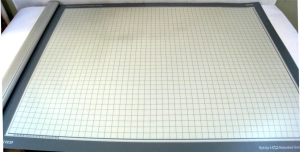
Digitizing table or "Table digitizers" are electromagnetic tables which are used with a special mouse to traverse the outline of patterns one point at a time. The digitizing mouse has various buttons for inputting a different type of point to the CAD/CAM program that runs on the computer which is linked to the digitizer. Accuracy depends on user's attention and experience as well as the pattern itself. Before starting to digitize, user must ensure that the digitizer is calibrated. Patterns must be fixed on the table surface using adhesive tapes and then removed. Although it is among the most widely used digitizing methods table digitizers have several disadvantages. Probably the most important aspect is speed. Digitizing is slow since it is done manually, one point at a time and also due to usage of adhesive tapes. Users lose considerable amount of time especially when there are many patterns to digitize in one batch and such batches are repeated often. Table digitizers are also expensive devices as well as being heavy and large in size which makes them inconvenient particularly in small workplaces. |

|
||
|
2- Roll up Digitizer
Roll up digitizer addresses the problems encountered with using table digitizers. They are thin, flexible and lightweight. They are stretched on a flat surface and rolled up after digitizing is finished. Roll up digitizers cost less compared to table digitizers. Although they can be rolled up they still require a flat surface of their size and digitizing speed is as slow as with table digitizers. |

|
||
|
3- Scanner Digitizer
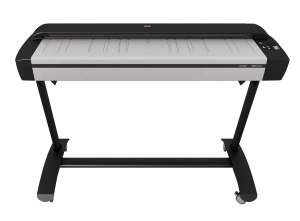
These are scanner-like devices which scan the image of patterns from a close distance and employ image processing techniques to process the scanned image. They are much faster compared to the previous three digitizers mentioned above but they also come at a higher price. Depending on their size they may claim some of the workspace. Also they may not always fit all the patterns at one go so patterns may have to be digitized one or two pieces at a time. |

|
||
|
4- Pattern Digitizing Software (Photo Digitizer)
Photo digitizers use image processing algorithms like scanner digitizers but the difference is that the image is captured using a digital camera rather than a scanner. The captured image is processed by the software and features such as pattern outline, notches, internal lines and grain lines are extracted from the image. Use of camera means the captured image's quality will depend on the lighting conditions, camera quality and camera position and that demands more sophisticated image processing algorithms. Photo digitizers can be further split into two categories: |
|||
|
4.1 First Generation Photo Digitizers
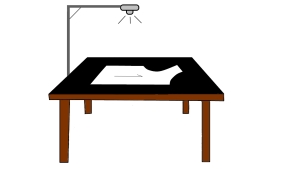
In this type of photo digitizers a table and a camera which is typically positioned above the table is used to shoot the images. They are fast compared to table digitizers, roll up digitizers and digitizing pens. The camera is either fixed on the ceiling or placed on a solid arm extending from the table. This means the workspace and portability issues remain unsolved. First generation photo digitizers require a calibration process which takes time and effort and may have to be repeated if position of either camera or table changes. |

|
||
|
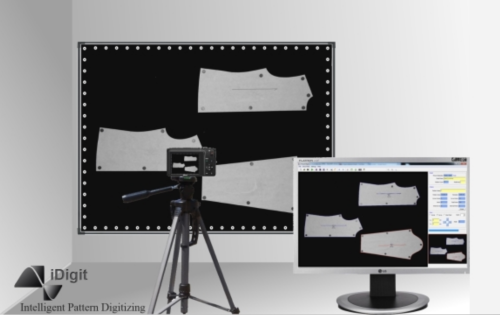
4.2 Second Generation Photo Digitizers Second generation photo digitizers address the calibration and portability problems faced with first generation photo digitizers. A second generation photo digitizer typically have a board with black background and white markings along the edges of the board which are used by the software to perform calibration automatically behind the scenes. Therefore the camera can be positioned in an appropriate place either on a tripod or the images can be shot by hand. These digitizers have high tolerance to changes with angle and position of camera and board thanks to their automatic calibration algorithms. This helps retaining a consistent accuracy each time. The board is fixed on the wall and patterns are held on the board using small magnets which is much more practical than using adhesive tapes. If a need arises to change the location of the system this can be done easily by relocating the board. One may expect that this kind of digitizing system may be costly. This is partly true since each vendor may charge a different amount for their calibration-free photo digitizers. Home |

|
||